Connect to an AI agent
Integrate with AI agents for interactive use cases, such as saving personal, team, and organizational preferences, standards, and policies.
Every MCP call from an external client counts toward your account's Free tier quotas (conversations, retrievals, and related caps). See Meko pricing for plan details.
Before you connect
Every client uses the MCP server URL https://mcp.mekodata.ai/mcp. The Datapacks > Connect dialog also shows this URL.
The automated installer requires Node.js 20.18.1 or newer.
Choose one authentication method for each client:
- API key: In the portal, open Settings > API Keys > Generate API key. Name the key, then copy or download it before you close the dialog. The key starts with
mko_tkn_, and Meko shows it only once. In the instructions below, replace<paste-your-api-key>with this key. - OAuth: Add the MCP server URL without an API key or authentication headers. The client opens your browser so you can sign in to the Meko portal. OAuth works only when the client registers a callback that Meko accepts. Use an API key for command-line clients and Kiro.
Use an API key for command-line clients, CI, and scripts. Command-line OAuth uses a local callback that Meko currently rejects, and unattended clients can't open a browser when an OAuth session expires.
Don't configure both methods for the same client. The client may choose OAuth and ignore your API key.
For the full workflow, see MCP server URL and Choose an authentication method.
OAuth and Manual setup
When you connect with OAuth or using the Manual setup, your agent interacts with Meko on demand only: you need to mention "Meko" in your prompt (for example, "save this to Meko," "search my Meko knowledge base") for the agent to call the tools. The agent won't proactively save conversations or capture memories unless you ask.
To get automatic behavior, use the Automated setup instead, or write your own skills to teach your agent when to call Meko tools.
Cursor Desktop
Automated setup
In the Meko portal, select Connect and follow the steps.
OAuth
In Cursor Desktop:
-
Open Cursor > Settings > Cursor Settings > Tools & MCPs > New MCP Server.
-
Add to
mcp.jsonwithout any auth headers:{ "mcpServers": { "meko": { "url": "https://mcp.mekodata.ai/mcp" } } } -
Complete the OAuth handshake when the browser opens.
Manual setup
In Cursor Desktop:
-
Choose Cursor>Settings>Cursor Settings>Tools & MCPs>New MCP Server.
-
Modify the
mcp.jsonfile that Cursor opens to add the following MCP server configuration.{ "mcpServers": { "meko": { "url": "https://mcp.mekodata.ai/mcp", "headers": { "Authorization": "Bearer <paste-your-api-key>", "User-Agent": "meko-mcp-installer/1.0" } } } }Replace
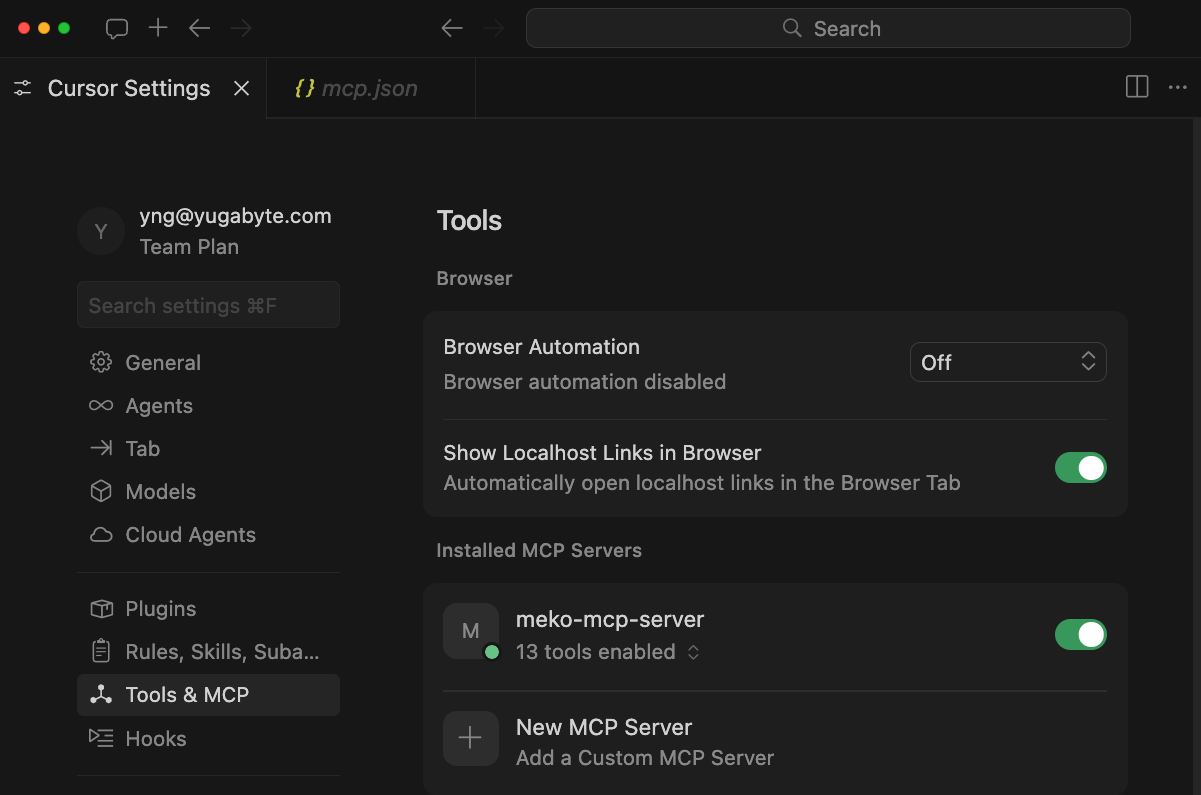
<paste-your-api-key>with the API key you saved from Settings>API Keys. Keep theBearerprefix, and keep theUser-Agentheader — see Choose an authentication method.The result should look like the following:
-
Verify the Connection by entering the following in chat.
List my datapacks in Meko
Cursor Web
This section is under development. Check back soon.
Claude Desktop
Automated setup
In the Meko portal, select Connect and follow the steps.
This adds a mcpServers.meko entry in the claude_desktop_config.json configuration file of your Claude Desktop (see also Manual setup).
OAuth
In Claude Desktop:
- Navigate to Settings, and under Customize select Connectors.
- Search for Meko in the Connectors search box, and add it as a custom MCP connector with the URL
https://mcp.mekodata.ai/mcp. - Complete the OAuth handshake when the browser opens.
Manual setup
In Claude Desktop (whether used for Chat, Cowork, or Code):
-
Navigate to Settings, and under Desktop app select Developer, then click Edit Config.
-
Edit the
claude_desktop_config.jsonfile to add the following MCP Server entry. Replace<paste-your-api-key>with the token you saved.{ "mcpServers": { "meko": { "command": "npx", "args": [ "-y", "mcp-remote@0.1.38", "https://mcp.mekodata.ai/mcp", "--transport", "http-only", "--header", "Authorization:${AUTH_HEADER}", "--header", "User-Agent:meko-mcp-installer/1.0" ], "env": { "AUTH_HEADER": "Bearer <paste-your-api-key>" } } } }Why split the key between
argsandenv: TheBearer <key>header value contains a space. Environment variable values can safely contain spaces, but some clients mishandle spaces inargsentries. The configuration keeps the argument space-free asAuthorization:${AUTH_HEADER}and storesBearer <key>inenv. This is the patternmcp-remoteexpects.How the substitution works: Claude Desktop doesn't expand
${AUTH_HEADER}. It passes theargsarray as written and setsAUTH_HEADERin themcp-remoteprocess environment. Whenmcp-remoteparses theAuthorizationheader, it replaces${AUTH_HEADER}with theBearer <key>value.Why the name matters:
mcp-remotesubstitutes only environment variables that are explicitly referenced inargs. TheAUTH_HEADERname inenvmust match${AUTH_HEADER}inargs. A different or unreferenced variable name doesn't authenticate the connection. -
Quit and restart Claude Desktop.
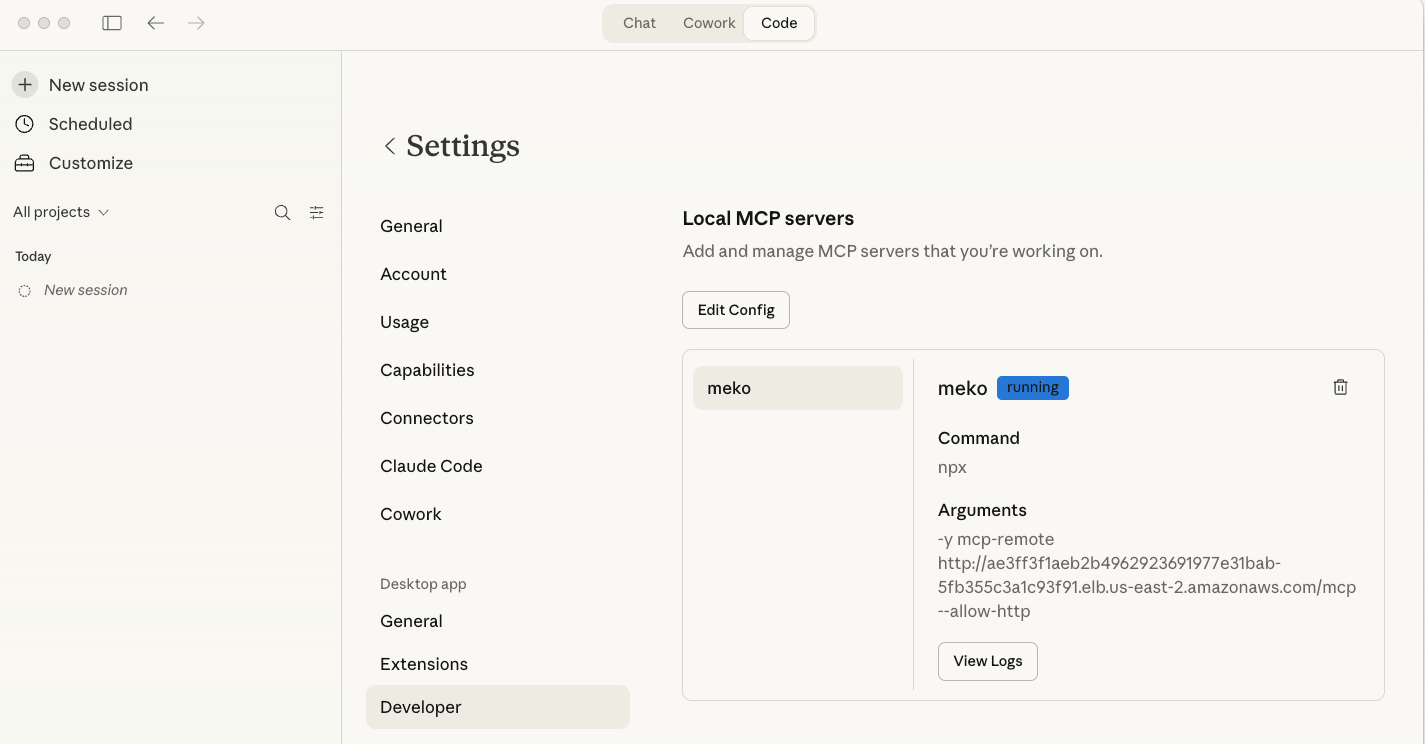
The result should look like the following:
 Handling errors
If you see errors when restarting Claude, examine the log file that appears. Verify that you have the correct version of node.js binaries in your path, use absolute paths, and consult online MCP Server configuration troubleshooting guides.
-
Verify the connection by entering the following in chat:
List my datapacks in Meko
Uninstall
How you remove Meko from Claude Desktop depends on how you installed it, because each installation method creates a different artifact.
Automated setup
Run the following:
npx @yugabytedb/meko-mcp@latest --client claude-desktop --uninstall
If you installed under a non-default server name, pass --server-name <name>. The uninstall removes only the MCP server entry; if you also imported a Meko skill bundle, remove it manually via Settings > Extensions.
OAuth
In Claude Desktop:
- Navigate to Settings, and under Customize select Connectors.
- Search for Meko in the Connectors search box and delete it.
Manual setup
In Claude Desktop:
- Navigate to Settings, and under Desktop app select Developer, then click Edit Config.
- Edit the
claude_desktop_config.jsonfile to delete themcpServers.mekoentry. - Restart Claude Desktop.
Claude Code
Automated setup
In the Meko portal, select Connect and follow the steps.
OAuth
-
Run the setup command in your shell to add the Meko MCP server:
claude mcp add --scope user --transport http meko https://mcp.mekodata.ai/mcp -
Complete the OAuth handshake when the browser opens.
Manual setup
-
Run the setup command in your shell to add the Meko MCP server to Claude Code:
claude mcp add --scope user --transport http meko https://mcp.mekodata.ai/mcp \ --header "Authorization: Bearer <paste-your-api-key>" \ --header "User-Agent: meko-mcp-installer/1.0"Replace
<paste-your-api-key>with the API key you saved from Settings>API Keys. Keep theBearerprefix — see Choose an authentication method. -
Verify the connection by entering the following at the command-line console:
List my datapacks in Meko
Updating the skills plugin
Skill content (the behavioral guides that teach the agent how to use Meko's MCP tools) ships in the meko-agent-skills plugin and versions independently of the MCP server. The marketplace source is https://github.com/yugabyte/meko-skills.git.
Inside an active Claude Code session
/plugin marketplace update meko-agent-skills
/plugin update meko-agent-skills@meko-agent-skills
/reload-plugins
If /reload-plugins warns that it would re-read the conversation, rerun it as /reload-plugins --force. Then run /doctor to confirm there are no plugin load errors.
From the shell
claude plugin marketplace update meko-agent-skills
claude plugin update meko-agent-skills@meko-agent-skills
The qualified plugin@marketplace form is required. Re-running the installer (npx @yugabytedb/meko-mcp@latest) updates an existing install automatically.
Enable auto-update
Auto-update is per-marketplace and disabled by default for third-party marketplaces. To opt in:
-
Open
/plugin, switch to the Marketplaces tab, selectmeko-agent-skills, and toggle Enable auto-update. -
Or add
"autoUpdate": trueto the existingmeko-agent-skillsentry in~/.claude/settings.json(user scope) or a project's.claude/settings.json. Keep thesourcefield — anautoUpdate-only replacement drops the marketplace source:{ "extraKnownMarketplaces": { "meko-agent-skills": { "source": { "source": "git", "url": "https://github.com/yugabyte/meko-skills.git" }, "autoUpdate": true } } }
Once enabled, Claude Code refreshes the marketplace and updates installed plugins in the background after startup. The running session keeps the versions it loaded at launch; you'll be prompted to /reload-plugins, or the new versions load on the next launch.
Open AI Codex Desktop
Automated setup
In the Meko portal, select Connect and follow the steps.
OAuth
In Codex Desktop:
- Choose Codex>Settings>MCP servers>Add server>Streamable HTTP.
- Enter the URL
https://mcp.mekodata.ai/mcpand leave the Bearer token field empty. - Click Authenticate beside Meko in the list of MCP servers and complete the OAuth handshake when the browser opens.
Manual setup
In Codex Desktop:
-
Choose Codex>Settings>MCP servers>Add server>Streamable HTTP.
-
Enter a name for the Meko MCP server.
-
Enter the Meko MCP server URL (
https://mcp.mekodata.ai/mcp). -
Enter a name (such as
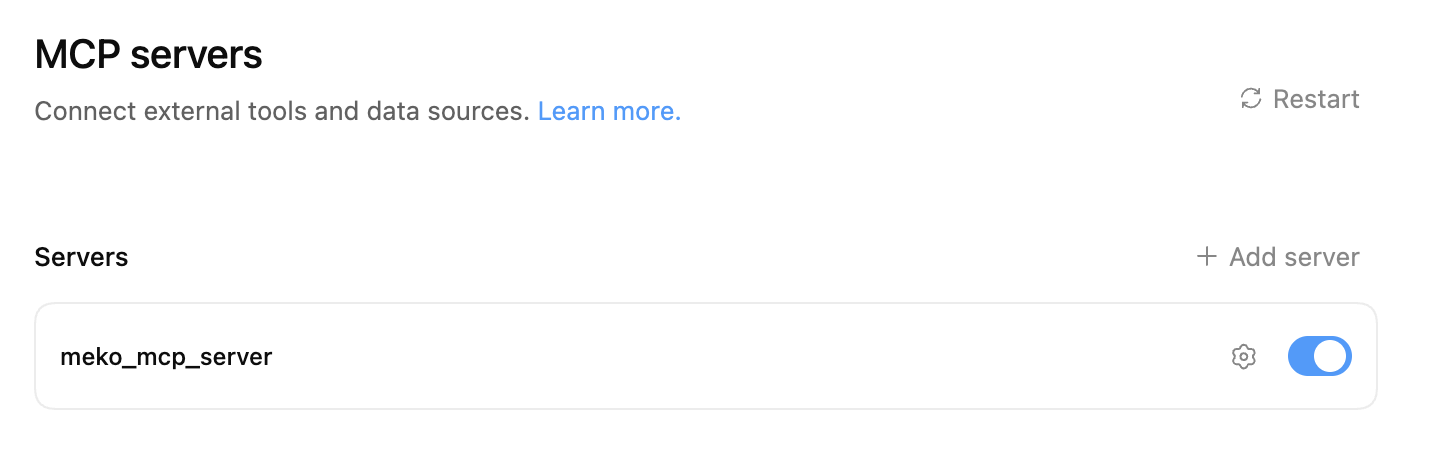
MEKO_MCP_TOKEN) for the Bearer token environment variable, and click Save.The result should look like the following:
-
Set the
MEKO_MCP_TOKENenvironment variable with your Meko API key in your terminal using the following command:launchctl setenv MEKO_MCP_TOKEN <paste-your-api-key> -
Verify that you set
MEKO_MCP_TOKENcorrectly with your API key.launchctl getenv MEKO_MCP_TOKEN -
Quit and restart Codex Desktop.
-
Verify the connection by entering the following in chat:
List my datapacks in Meko
Kiro IDE and CLI
Kiro IDE and kiro-cli share their MCP configuration, skills, and hooks. One install configures both:
npx @yugabytedb/meko-mcp@latest --client kiro
The kiro-cli and kiro-ide aliases run the same install. If you set $KIRO_HOME, the installer uses that directory instead of ~/.kiro.
The installer uses API-key authentication because Kiro registers a local OAuth callback that Meko rejects. It also installs the Meko skill, steering, and both Kiro hook formats for durable capture.
Manual setup
If you only need an on-demand MCP connection, add this entry to ~/.kiro/settings/mcp.json:
{
  "mcpServers": {
    "meko": {
      "url": "https://mcp.mekodata.ai/mcp",
      "headers": {
        "Authorization": "Bearer <paste-your-api-key>",
        "User-Agent": "meko-mcp-installer/1.0"
      }
    }
  }
}
Replace <paste-your-api-key> with the key you saved from Settings > API Keys, then protect the file because it contains the key:
chmod 600 ~/.kiro/settings/mcp.json
Manual setup doesn't install the Meko skill, steering, or capture hooks. Use the automated installer when you want Meko to capture conversations and apply its behavioral guidance.
Kiro hooks expose user prompts and final assistant responses. They don't expose tool calls or hidden reasoning, so those details aren't included in automatic capture.
Uninstall
npx @yugabytedb/meko-mcp@latest --client kiro --uninstall
VS Code
-
Run the following command:
echo "### Installing the latest Node.js ###"
curl -o- https://raw.githubusercontent.com/nvm-sh/nvm/v0.40.2/install.sh | bash
source ~/.$(basename $SHELL)rc
nvm install --lts
echo "### Registering the Meko MCP server ###"
npx mcp-add@latest \
  --name meko \
  --type http \
  --url 'https://mcp.mekodata.ai/mcp' \
  --headers 'Authorization=Bearer <paste-your-api-key>,User-Agent=meko-mcp-installer/1.0' \
  --scope global \
  --clients 'vscode'
VS Code can connect to a remote MCP server on its own, so this registers the URL and its headers directly. Unlike Claude Desktop, it needs no local
mcp-remotehelper.Replace
<paste-your-api-key>with the API key you saved from Settings>API Keys. -
Verify the connection by entering the following in chat:
List my datapacks in Meko